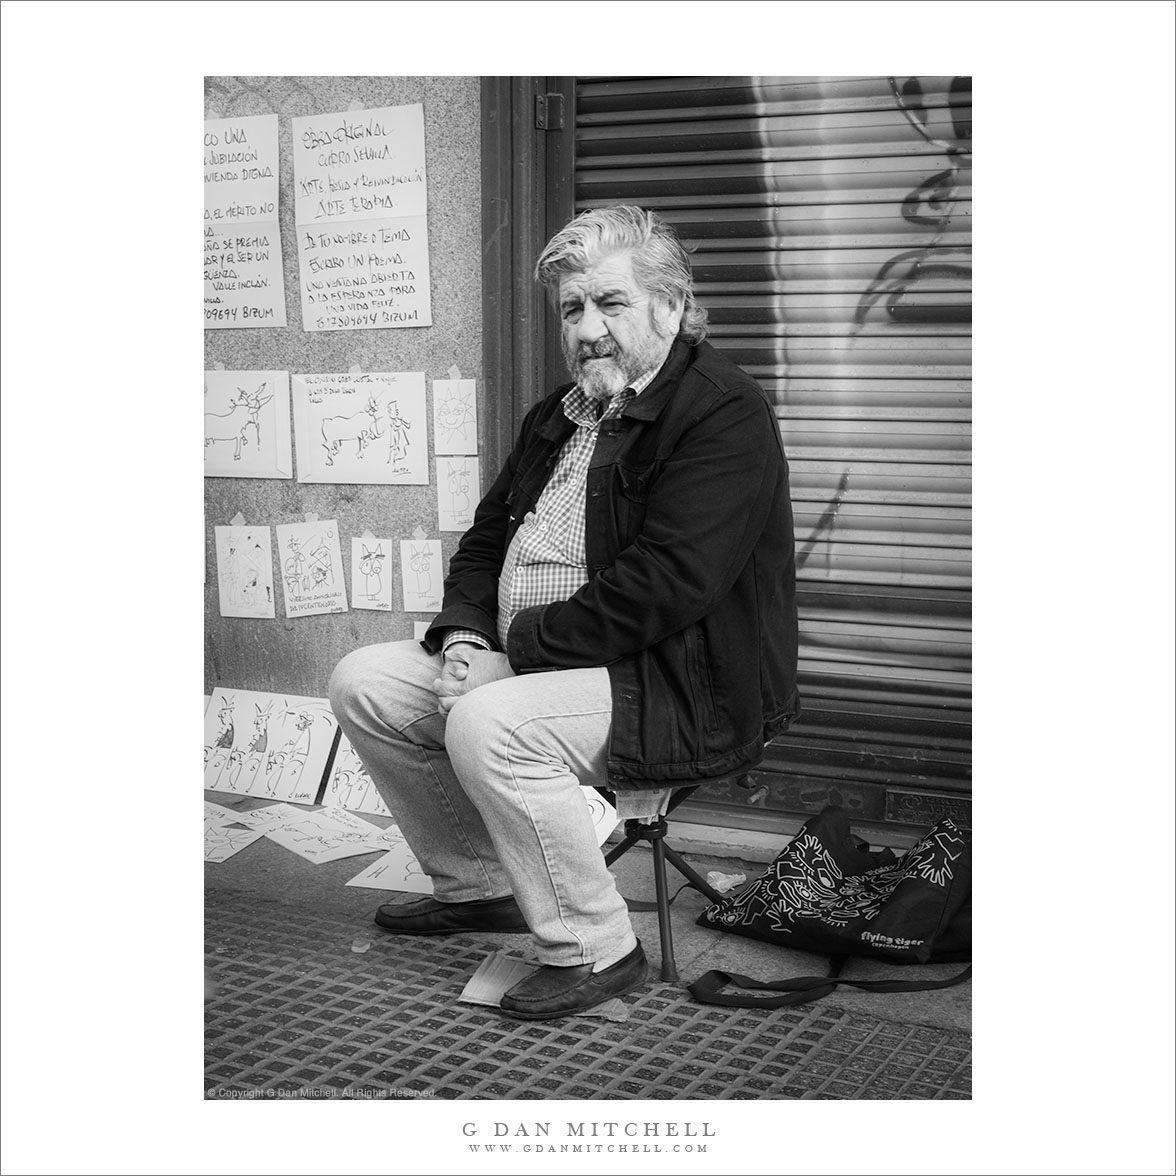
Tag Archives: portrait

Photographer Charles Cramer

Photographer Charles Cramer
Photographer Charles Cramer setting up a display for a reception to follow an August 16, 2015 concert

Photographer Charles Cramer. © Copyright 2019 G Dan Mitchell – all rights reserved.

Photographer Charles Cramer setting up a display for a reception to follow an August 16, 2015 concert.

This photograph of Charles Cramer is perhaps a bit unusual in several ways. I made it while Charlie was setting up (or taking down?) a display of a number of his photographs at a concert he gave in the South Bay Area. (Many of you reading this are likely to be aware of his photography, but perhaps not everyone knows that he is also an accomplished pianist and organist… and even a choir director!) The pose is perhaps not typical for a photograph of a “landscape photographer,” either as he is a) indoors and b) setting up a light stand! (The purpose of the stand is to illuminate prints for display in this case.)

We count ourselves lucky to know Charlie and to have known him for some time. (He played at our wedding, believe it or not.) He has also graciously shared his photographic knowledge with us in a number of ways. I often tell the story of how I finally got up to speed on my conversion to digital photography. I had been using digital cameras for a while, and I had purchased an early digital printer, but the results were just not what I hoped for and I was getting frustrated. I contacted Charlie to ask for some advice — should I take a class? sign up for a workshop? read a book? something else? He replied and basically said, “Come over and bring a few files.” I did, and in the several hours he spent with me on these files I learned (as I often say) “90% of what I needed to know about digital post-processing and printing” — and for that I am forever grateful!


G Dan Mitchell is a California photographer and visual opportunist. His book, “California’s Fall Color: A Photographer’s Guide to Autumn in the Sierra” is available from Heyday Books and Amazon.

Blog | About | Flickr | FacebookEmail

Links to Articles, Sales and Licensing, my Sierra Nevada Fall Color book, Contact Information.


All media © Copyright G Dan Mitchell and others as indicated. Any use requires advance permission from G Dan Mitchell.

Mark Cavendish, Stage One, 2010 Tour of California

Mark Cavendish, Stage One, 2010 Tour of California

Mark Cavendish, Stage One, 2010 Tour of California. Nevada City, California. May 16, 2010. © Copyright G Dan Mitchell – all rights reserved.

Pre-race photograph of Mark Cavendish at Stage One, 2010 Amgen Tour of California

Mark Cavendish is arguably today’s pre-eminent professional cycling sprinter. This photograph was made in Nevada City, California as he emerged from the Columbia HTC team vehicle to sign autographs before getting on his bike and heading to the starting line for stage one of the 2010 Amgen Tour of California. He ultimately one the sprint in Sacramento over 100 miles and several hours later.

I posted yesterday about my photography in the team area prior to these races and the great opportunities this provides for getting close shots of riders, along with cycling equipment, spectators, and the general excitement before the start of a major professional race. My tactic here is usually to put a long lens on the camera, explore, and be ready to react quickly – often a rider may appear for a few moments outside a team vehicle or quickly ride by on the way to the starting line and you have to pick off a shot quickly or not get it at all. In this case I spotted a nearby stairway that would give an unobstructed view of anyone coming out of this team vehicle and gave me a clear shot at the path that riders were taking to the finish line. I decided to spend a few minutes here to see what would happen, and I got lucky when Cavendish emerged and spent a few minutes with fans.

This photograph is not in the public domain and may not be used on websites, blogs, or in other media without advance permission from G Dan Mitchell.

G Dan Mitchell Photography | Twitter | Friendfeed | Facebook | Facebook Fan Page | Email

Technical Data:
Canon EOS 5D Mark II
Canon EF 100-400mm f/4.5-5.6 L IS USM at 400mm
ISO 400, f/5.6, 1/400 second

keywords: amgen, tour, of, california, stage, one, 2010, bicycle, road, race, pro, professional, usa, north america, sports, nevada, city, pre, race, mark, cavandish, winner, first place, sprinter, high road, columbia, htc, team, sunglasses, portrait, close-up, stock

Java Hut Employee

Java Hut Employee

Java Hut Employee. San Francisco, California. July 1, 2009. © Copyright G Dan Mitchell – all rights reserved.

Man standing in the doorway of the Java Hut, San Francisco, California.

As I was walking along the San Francisco waterfront very early in the morning on July 1, I was shooting the South Beach Harbor when I noticed this fellow standing in the doorway of the Java Hut and motioning to me to take his photograph – I couldn’t refuse. I managed to get two photographs of him in his red apron against the red and white exterior of the coffee shop. (I only realized today that this should have been my July 4 photo!) I didn’t get his name, but I know this place well so I’ll try to take him a print the next time I get up there.

This photograph is not in the public domain. It may not be used on websites, blogs, or in any other media without explicit advance permission from G Dan Mitchell.

keywords: san francisco, california, usa, summer, city, urban, travel, man, person, street, urban, worker, employee, waiter, java hut, restaurant, coffee, shop, stand, door, window, blue, red, apron, moustache, plaid, embarcadero, portrait, south beach, harbor, shoreline, stock, travel, character

Why I like DSLR Live View Shooting

(Notes: Article slightly updated in February 2015. Original article title was “Canon EOS 5D Mark II: Why I like ‘live view’.” These days the Canon 5DII is no longer my primary camera, but the points remain much the same.)

It took me a while, but I eventually came to rely on live view a lot in my photography.

Back when I acquired a Canon EOS 5D Mark II I assumed that the main improvement over my previous camera would come from the 21 megapixel sensor — the previous camera had only 12 MP. Other features of the updated version of the Canon 5D series seemed like they would either be minor improvements or perhaps not be of any use to me at all. I lumped the “live view” feature of the camera into the latter category. I understood that it would permit me to view the scene “live” on the rear screen, but I failed to see any big advantage over looking through the viewfinder, and much of what I had heard suggested that there would be serious downsides to the feature.

Consequently, it wasn’t until after I had the camera for some time that I actually thought to try out live view, which locks up the mirror and shows a video version of the live image on the rear display. At first the feature seemed very counterintuitive, since I was completely used to looking at the traditional kind of “live” view – the one seen through the viewfinder. On top of this, with live view enabled the normal autofocus system is turned off – or, more correctly, works in a very different way. However, once I did start to use live view I realized that it is one of the most significant and useful features of the Canon 5D Mark II for certain types of photography. How is it useful? Here is a list:

  1. Live histogram – You can display a live histogram on the rear screen in live view. This histogram display updates instantaneously as the scene changes or as you make exposure adjustments. Rather than making an exposure, checking the histogram, making adjustments, and then shooting again – you can simply get it right the first time.
  2. Manual focus – In many cases live view provides the very best method for achieving accurate manual focus. While you can manually focus on the ground glass of the normal viewfinder, really critical manual focus is very difficult using that approach. However, with live view you can zoom in to 5X or 10X or higher magnification and focus precisely on any point in the frame by moving the portion of the image shown in the magnified view. This is like having a 10x loupe built into the camera. There are more advantages related to manual focusing, but I’ll break them out separately below.
  3. Accurate Depth of Field – Determining what will and will not be sharp enough at a given aperture has always involved a bit of guesswork on a DSLR. You can press the Depth of Field (DOF) Preview button and try to check this visually, but this is even more difficult than trying to achieve accurate manual focus via the viewfinder. When you press the DOF Preview button the optical viewfinder becomes dark, making it difficult or impossible to accurately assess DOF. However, live view automatically adjusts the display brightness when you press the DOF preview button – so you can see the image as well at f/16 as you can at f/1.4. Not only that, but you can again use the 5X or 10X or higher magnification on any part of the scene to check focus of any area of the composition with great accuracy.
  4. Night photography – It was while doing night photography that I first gave live view a serious try. I was shooting some industrial subjects under full moon and artificial light and trying to focus on the side of a dimly lit building without much luck. AF could not acquire focus, and in the darkness I couldn’t see enough detail to focus manually through the viewfinder. However, with live view — keeping in mind that the camera adjusts the image brightness on the screen — my very dark subject was light enough that I could manage to focus manually and get a sharp image.
  5. Neutral density filters – I sometimes use a 9-stop neutral density (ND) filter in order to make rather long daytime exposures. The 9-stop ND is so dark that you cannot really even see your scene through it and composing and focusing are impossible. My previous method of operation was to compose the scene and focus first, switch off the AF feature, attach the ND, and then shoot “blind.” However, if I needed to change the composition or adjust focus I would need to remove the ND filter again and repeat the laborious process. I quickly discovered that the live view can display a useful image even with this filter attached, permitting changes in composition, manual focus, and even depth of field checks while the filter remains in place.
  6. Optional display grid – Several different electronic grids may optionally be superimposed on the live view display. I often switch on the  3 x 3 (three horizontal and three vertical lines) grid to check that the horizon is level or that vertical lines are actually vertical.
  7. Awkward camera positions – As long as you can still see the LCD, you can place your camera in positions that would not work if you had to compose through the viewfinder and would otherwise have to “shoot blind” or miss the shot. I’ve found it useful for some wildflower shots where the camera had to be down low among the plants. In addition, I can shoot with the camera on the tripod raised well above eye height with live view – this has allowed me to, for example, shoot over the tops of tall fences or simply get a higher perspective.
  8. Tilt/Shift lenses – Although I’m not a tilt/shift lens user, several photographers (see below for the link to the first of them) pointed out that live view greatly improves the usability of T/S lenses and makes it easier to achieve critical focus.
  9. Shooting in windy conditions – Here’s a new and unexpected use of live view that I discovered in January 2011 when shooting with a 400mm lens in windy conditions. In such conditions I’ll often wait until  the wind have briefly calms enough to get a sharp image, but it can still be a bit of a guess. However, if I activate live view and use the 10x magnification I can directly see the effect of the wind on the image and then simply hit the remote release button when I see the vibration stop in the display.
  10. Elimination of mirror and shutter vibration – Because today we push small original images from cropped sensor or full frame sensor DSLRs to greater and greater print sizes, all factors that affect potential image sharpness become more critical. When it comes to minimizing mechanical vibration within the camera, live view is the current best solution. Because the mirror is already raised so that the image from the sensor is visible while focusing and composing, “mirror slap” vibration is completely eliminated. In addition, by selected an electronic first curtain option, the shot can be initiated without motion from the shutter curtain. According to tests I’ve seen and judging by my own experiments, when you are doing critical work from the tripod this can materially help when it comes to eliminating blur from camera motion.
  11. Camera Sound – In some situations the sound of a DSLR is objectionably loud, both from the slap of the mirror rising and falling and from the physical motion of the shutter curtain. On at least some cameras with live view, there is a first and second electronic curtain setting – called mode 2 on my Canon DSLR – that starts and ends the exposure electronically rather than flapping the shutter curtain across the sensor. It also leaves the camera in live view mode at the end of the exposure, rather than flipping the mirror back down. This significantly reduced – though doesn’t eliminate – the volume of sound from the camera, so it can be useful in certain situations where the shutter/mirror sound might otherwise be too loud.

This list could be even longer, but I’ll stop here for now. Are there any downsides to using live view? In some situations there are, so live view is not called for in every photograph.

  1. Battery life – The use of live view significantly reduces the number of frames you can expose before your battery runs out of power. I have made 400-500+ photographs on one battery with the 5D II without live view and not run the battery down to the point that I would think about switching. However, with heavy live view use on a few occasions I got only a few more than 200 shots. I limit my use of live view in situations where battery life is an issue, such as when I go on long backpacking trips. (Hint: Rather than leaving the camera in this battery-draining mode, sometimes it pays to focus and compose in live view, then switch back to the “normal” mode with mirror lock-up enabled to wait for the right moment to make the exposure.)
  2. Active subjects – While live view is great for relatively static subjects (such as architecture and landscapes, for example) it is far less suited to shooting active subjects. For those I’ll stick to using the through-the-lens viewfinder.
  3. Portraits – While you certainly could shoot portraits in live view, I think that it is sometimes better to either peer through the pentaprism viewfinder at the almost-real view seen there or, better yet in some cases, step back from the viewfinder/camera and just look right at your subjects. (Update: Someone with far more portrait experience than I have recently made a very good a point about getting away from the viewfinder and communicating directly with your subject – though you could do that independent of Live View.)
  4. Autofocus – Autofocus is possible in live view, but either of the options for AF are a bit clunky. (They are improving as of this most recent update.) I virtually never use live view with AF, but almost always use it with manual focus.

When I first wrote this article, soon after beginning to use live view, I wrote, “In the end, although I shoot more often without live view than with it, for certain types of photography I now find it indispensable , including much urban and natural landscape work, night photography, and when working with neutral density filters.” Much of that sentence still stands, but the truth is that in my photography I now use live view most of the time.

UPDATES:

Todd Klassy points out that live view is very powerful for those who shoot with tilt/shift lenses.

Regarding my point about portraits, someone with far more portrait experience than I have recently made a very good a point about getting away from the viewfinder and communicating directly with your subject – though you could do that independent of Live View.

A “thank you” to 1001 Noisy Cameras 5DMKII blog for the link.

(If this post has helped you make a purchase decision, please consider making your purchase by clicking an affiliate link on this web site – it helps support the blog, and does so at no cost to you. Thanks!)

© Copyright 2015 G Dan Mitchell – all rights reserved.


G Dan Mitchell is a California photographer and visual opportunist whose subjects include the Pacific coast, redwood forests, central California oak/grasslands, the Sierra Nevada, California deserts, urban landscapes, night photography, and more.
Blog | About | Flickr | Twitter | Facebook | Google+ | 500px.com | LinkedIn | Email

Text, photographs, and other media are © Copyright G Dan Mitchell (or others when indicated) and are not in the public domain and may not be used on websites, blogs, or in other media without advance permission from G Dan Mitchell.