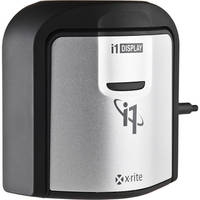
This isn’t the typical post here, but today only there is a great deal on the X-Rite i1 Display One Pro calibration system at site-affiliate B&H Photo. The device calibrates computer and other monitors and projectors and has a bunch of other useful features that I won’t list here. If you need such device, this sounds like a great time to get it. Here are the details:
Big savings on X-Rite i1 Display One Pro calibration system at B&H — Regular price $249. $95 off right now makes the cost $154. An additional $25 mail-in rebate brings your final cost to only $129! VERY LIMITED TIME OFFER – ENDS AT MIDNIGHT EST TODAY or when supplies run out. This unit calibrates a wide range of monitors and projection systems.
Note the VERY LIMITED DURATION of this offer. It ends tonight at midnight EST or sooner if supplies run out. Now, off to see about ordering… ;-)
I returned last night from a week-long visit to New York City. While this wasn’t just a photography visit, enough photography was part of the plan that I had to carry a reasonable amount of equipment. Typically I would bring along my Macbook, but this time I decided to leave the laptop at home and see if I could get by with just an iPad instead.
I knew that this would necessitate some compromises in the way I usually operate on the road. For example, serious photography applications like Photoshop and Lightroom simply don’t run on the iPad, so there would be no possibility of doing real post-processing work on the road. The iPad doesn’t have a “real” keyboard, instead providing an on-screen “virtual keyboard” – more on that below. On the positive side, the iPad is positively tiny compared to any real laptop. It makes my 13″ Macbook seem terribly bulky by comparison. The iPad slips easily into the external pocket of my Crumpler Eight Million Dollar Home camera bag, and doesn’t add enough weight to the package to be worthy of note. The battery life is tremendous and the charger is very small.
Columbia HTC sprinter Mark Cavendish signs autographs before the start of stage one of the 2010 Amgen Tour of California in Nevada City, California.
One more photograph from this year’s Amgen Tour of California, this one shot in the “pit” area before the start of the stage in Nevada City, California. Cavendish went to to win the sprint and the stage later that day in Sacramento.
Why another cycling photo? Well… I’m spending my weekend grading term papers and other end-of-term work from my students. I’ve had little time to work on photography for the past week, and I’ve had this one last 2010 TOC photograph waiting for posting – so I’m taking advantage of that, making this post, having another cup of coffee, and getting back to the grading!
Some might be surprised to find that I take every opportunity to photograph bicycle racing. Although I’m primarily an urban and natural landscape shooter (to generalize just a bit) I also have a passion for shooting a few other surprising subjects. One of these is professional bicycle racing. Although I never raced, I was at one time a very serious cyclist. I trained with folks who did race and for several years I rode as if I were preparing to race, doing over 10,000 miles per year. With that in mind, it might seem less surprising that I interrupted my photographs of Death Valley, the coast redwoods, and the Pacific coastline to post a week of bicycle racing photos.
During the last few years I’ve been fortunate to be able to shoot stages of the Amgen Tour of California professional stage race in northern California. As I’ve done so, I’ve gradually figured out more strategies that let me get some effective photographs. Here’s a quick summary of a few of them.
Time trials, especially those on short courses, can be the best opportunity to shoot riders on their bikes. Each competitor rides the course individually, so you can get a clear view of the rider approaching. Because lower ranked riders go first, you can experiment with locations, lighting, and so forth on them… and have your shooting strategy worked out by the time the big names arrive.
If you want to shoot the peloton (the pack of riders) try to do so at a start in a downtown area that includes “parade laps” – where the pack does a few loops at less competitive speeds before heading out on the open road. You’ll have similar opportunities at the end of a stage that finishes with several downtown loops, though things tend to happen a lot faster at the end than during the parade laps.
If you try to shoot a sprint finish and cannot be right at the finish line – and you probably cannot – try to be in the area 100-200 meters from the line. At this point there is tremendous action as the final sprint starts to take place and, in my experience, some very dramatic shots are possible – even more so than at the finish line when the race has usually already been decided.
In all of these situations, unless you are very experienced at tracking riders close up with a long lens as they fly by at high speed… practice on every rider that comes by. I’ll even practice tracking support motorcycles, police escorts – anything that moves. Eventually you want to pan smoothly while you remain continuously aware of the position of the riders in the frame – and the non-rider elements in the background. To put it mildly, this isn’t easy – and it takes a lot of practice.
When you track riders moving at high speed, think about putting their torsos/hips in the center of the frame vertically. Unless you are shooting very tight, if you center their heads you’ll get lots of empty space above them and cut off their legs and bikes.
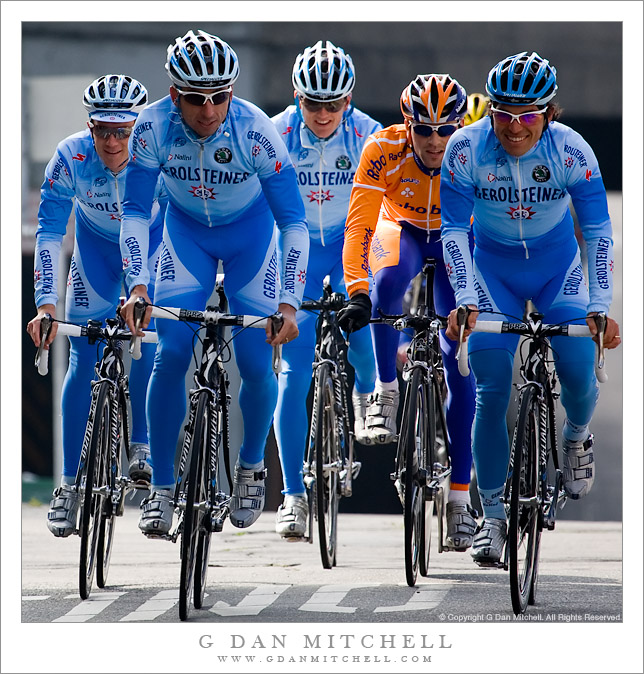
Team Gerolsteiner Warms Up for the Prologue
Pick your shooting location carefully. You certainly want a spot where the riders are likely to be in dramatic and dynamic positions. Turns can be good for this, for example. But also carefully consider the background to your shot – who is standing on the other side of the road and what is beyond the riders. (I once shot a series of riders warming up for a time trial… only to realize later that there was a bright green outhouse behind them!) Also think carefully about the ambient lighting. If the riders are backlit there is a good chance that they will be very dark. I try to place myself in a position where they will be front or side-lit.
Counter-intuitively, very high shutter speeds may not always be a good choice. Yes, you may stop the action – but you also may end up with very static looking shots. In many cases you’ll more effectively capture the speed and motion of racing if you lengthen the exposure and track the riders, thus allowing some motion blur.
Don’t let bad weather dissuade you from shooting. Often rain or clouds or fog can make for some of the most dramatic images. Be careful with your gear, but try to take advantage of these conditions.
If you are going to try to shoot the pack in the middle of a long road stage, you need to plan carefully. The road will often close well before the peloton arrives, so you need to be in place well ahead of time – an hour or many hours before the race passes. If possible, scout the area where you think you’ll shoot ahead of time. Look for a dramatic setting – an expansive view, a bridge, forest, anything that can make your shot something other than just “bikes on a road.” Consider shooting on an uphill section – the pack will go more slowly. Try out different focal lengths to see what will work best in your location. Consider having two camera bodies with different lenses – a telephoto to do long shots as the group approaches and a shorter lens to shoot the pack as it is right in front of you.
The pack will pass very quickly. A few motorcycles will pass, then the pack will suddenly appear in a rush of color and wind, followed quickly by the support vehicles… and then they are gone. You’ll have only seconds to shoot. You must pick your spot ahead of time. You’ll almost certainly want to use burst mode – perhaps shooting jpg so that you can get more images before the camera buffer fills. Better to err on the side of using a focal length that is too short (wide) than one that is too long (telephoto) – you can crop later if necessary.
The actual race is not the only thing worth shooting – there are many, many interesting subjects before and after the race. I often find interesting subjects among the spectators waiting for the pack or even watching the peloton pass. One of the great things about pro bike racing is that you have amazing access to the riders in the team area before the race. I often spend at least an hour there before the race, shooting like crazy so that I don’t miss anyone. You may look up and see Lance Armstrong riding past you five feet away, or you might see some guy you don’t recognize talking to fans – only to find out later in the day that he was the stage winner. I generally use a relatively long lens in this area and “snipe” – getting close shots of riders. (You’ll generally have far fewer opportunities like this after the race, when the riders quickly disappear.)
Occasionally try things that aren’t quite so obvious. I once found myself on an inside corner a few blocks from the end of a stage as the peloton came into town. I put on my widest lens – a 17mm zoom – and stuck the camera through the fence down low to the ground. With the camera in burst mode I shot as riders leaned into the turn only a foot or two from the camera.
Large apertures are often better than small apertures. Yes, the small apertures give you greater depth of field – but they also force you to shoot a slower shutter speeds (not always a bad idea…) and put non-central subjects in sharper focus. Often the riders will stand out more against an out of focus background than against a busy in-focus background. (It is difficult to generalize too much about this though – if you are already throwing much of the scene out of focus by using a slow shutter speed, there can be advantages to the smaller aperture.)
When shooting individual racers, especially in the team area, do shoot a lot of frames – but also think carefully about what the riders are doing and what they look like. I’ll often try to quickly get an initial shot that is serviceable – but once I get that I become a bit more selective. I’ll watch the subjects face for the most interesting expression or better light. I’ll also watch to see them interact with fans – this often creates really compelling moments.
Shoot a lot. Things happen quickly, and not just on the course. Not every shot is going to be a great one, but you’ll often have little time to carefully consider each shot – better to work on instinct. (Oddly, I realized a few years ago that the closest experience to this might be shooting certain types of wildlife – birds in flight for example.)
G Dan Mitchell is a California photographer whose subjects include the Pacific coast, redwood forests, central California oak/grasslands, the Sierra Nevada, California deserts, urban landscapes, night photography, and more. Blog | About | Flickr | Twitter | Facebook | Google+ | 500px.com | LinkedIn | Email
Photographer and visual opportunist. Daily photos since 2005, plus articles, reviews, news, and ideas.
Manage Consent
To provide the best experiences, we use technologies like cookies to store and/or access device information. Consenting to these technologies will allow us to process data such as browsing behavior or unique IDs on this site. Not consenting or withdrawing consent, may adversely affect certain features and functions.
Functional
Always active
The technical storage or access is strictly necessary for the legitimate purpose of enabling the use of a specific service explicitly requested by the subscriber or user, or for the sole purpose of carrying out the transmission of a communication over an electronic communications network.
Preferences
The technical storage or access is necessary for the legitimate purpose of storing preferences that are not requested by the subscriber or user.
Statistics
The technical storage or access that is used exclusively for statistical purposes.The technical storage or access that is used exclusively for anonymous statistical purposes. Without a subpoena, voluntary compliance on the part of your Internet Service Provider, or additional records from a third party, information stored or retrieved for this purpose alone cannot usually be used to identify you.
Marketing
The technical storage or access is required to create user profiles to send advertising, or to track the user on a website or across several websites for similar marketing purposes.